DIY cookie kits are a delightful, creative baking experience, offering pre-measured ingredients and decorating supplies for bakers of all skill levels.
What is a DIY Cookie Kit?
A DIY cookie kit represents a convenient and wonderfully creative package designed to bring the joy of baking directly into someone’s home. These kits thoughtfully bundle together everything needed to bake and decorate cookies, eliminating the need for individual ingredient sourcing and measurement. Typically, a kit includes pre-measured dry ingredients for the cookie dough itself, ensuring baking success.
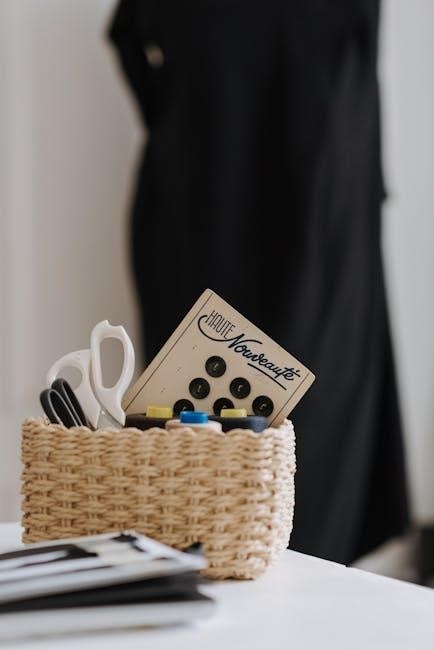
Beyond the basics, a complete DIY cookie kit also provides essential tools like cookie cutters in various fun shapes, and a selection of icing options with vibrant colors. Sprinkles and other delightful decorations are also standard inclusions, empowering bakers of all ages to unleash their creativity and personalize their sweet creations. It’s baking, simplified and amplified!
Why Choose a DIY Cookie Kit?
Choosing a DIY cookie kit offers a unique blend of convenience and creative expression. They’re perfect for gifting, providing a thoughtful and engaging activity for recipients of all ages. For those seeking a fun family activity, these kits eliminate the hassle of gathering ingredients and measuring – jumping straight to the enjoyable parts of baking and decorating.
Hobby bakers appreciate the pre-portioned ingredients, while busy individuals enjoy a simplified baking experience. Furthermore, DIY cookie kits foster creativity, allowing for personalized designs and a sense of accomplishment. They’re a fantastic way to introduce baking to children or simply enjoy a relaxing and delicious pastime!
Kit Contents: A Comprehensive List
A well-rounded DIY cookie kit typically includes pre-measured dry ingredients, cookie cutters, icing, sprinkles, and clear, concise instructions for a delightful experience.
Pre-Measured Dry Ingredients
The foundation of any successful DIY cookie kit lies in accurately pre-measured dry ingredients. This eliminates baking guesswork for the recipient and ensures consistent results. Typically, this includes flour – all-purpose is standard, but gluten-free options cater to dietary needs – granulated sugar, brown sugar (light or dark, clearly labeled), baking powder, baking soda, and salt.
Packaging these ingredients individually in resealable bags is crucial for freshness and prevents mixing. Consider using portioned containers for smaller kits. Clearly label each bag with the ingredient name and quantity. Providing a slightly generous amount accounts for minor spillage during measuring. Quality ingredients elevate the entire experience, making the kit feel more premium and encouraging repeat purchases.
Cookie Cutters & Shapes
Selecting the right cookie cutters is vital for a fun and engaging DIY cookie kit experience. Durable, metal cookie cutters are preferred over plastic, offering cleaner cuts and lasting longer. Variety is key – include a mix of classic shapes like stars, hearts, and circles, alongside more unique or seasonal designs.
Consider the target audience; simpler shapes are ideal for younger children, while intricate designs appeal to adults. Including 2-3 cutters per kit provides options without overwhelming the user. Ensure the cutters are appropriately sized for the dough quantity provided. Packaging cutters securely prevents damage during transit and enhances the kit’s overall presentation.
Icing Options & Colors
DIY cookie kits thrive on vibrant icing! Providing powdered sugar icing mix is convenient, requiring only water addition. Include gel food coloring – it’s more concentrated than liquid, yielding brighter hues. Offer a curated color palette of 3-5 shades; primary colors allow for mixing.
Pre-portioned icing mix bags simplify the process. Consider including piping bags and tips for controlled decorating. Alternatively, squeeze bottles are user-friendly, especially for children. Clearly label each color and provide basic mixing instructions. A small amount of lemon juice can enhance icing flavor and stability.
Sprinkles & Decorations
Sprinkles and decorations elevate any DIY cookie kit! A mix of shapes, colors, and textures is key. Include classic jimmies, nonpareils, sanding sugar, and fun shapes like stars or hearts. Edible glitter adds a magical touch. Consider seasonal sprinkles for themed kits – snowflakes for winter, pastels for spring.
Small candies like mini chocolate chips or edible pearls offer additional decorating options. Package sprinkles in individual, sealed bags to maintain freshness and prevent mixing. Provide a generous amount, as decorators love variety! A small scoop or spoon can aid in portion control and reduce mess.

Baking Instructions: Step-by-Step Guide
Clear, concise baking instructions are crucial for DIY cookie kit success, guiding users through dough preparation, chilling, rolling, cutting, and baking.
Preparing the Cookie Dough
Begin by emptying the pre-measured dry ingredients into a mixing bowl. Add the specified amount of butter (often softened, but instructions should clarify) and any wet ingredients like eggs or vanilla extract. Mix on low speed until the dough just begins to come together, avoiding overmixing which can lead to tough cookies.
Gradually increase the speed to medium and continue mixing until a smooth, cohesive dough forms. If the dough seems too dry, add a teaspoon of milk or water at a time until it reaches the desired consistency. The dough should be pliable and not overly sticky. Ensure all ingredients are fully incorporated for a consistent bake.

Chilling the Dough
Once the cookie dough is prepared, it’s crucial to chill it thoroughly. Wrap the dough tightly in plastic wrap, ensuring no air pockets remain, to prevent drying. Flatten the wrapped dough into a disc shape for more even chilling. Refrigerate for at least 30 minutes, but ideally 2-4 hours, or even overnight.
Chilling solidifies the butter, preventing cookies from spreading excessively during baking, resulting in crisper, more defined shapes. Properly chilled dough is also easier to roll out and cut without sticking. Don’t skip this step – it significantly impacts the final cookie texture and appearance!
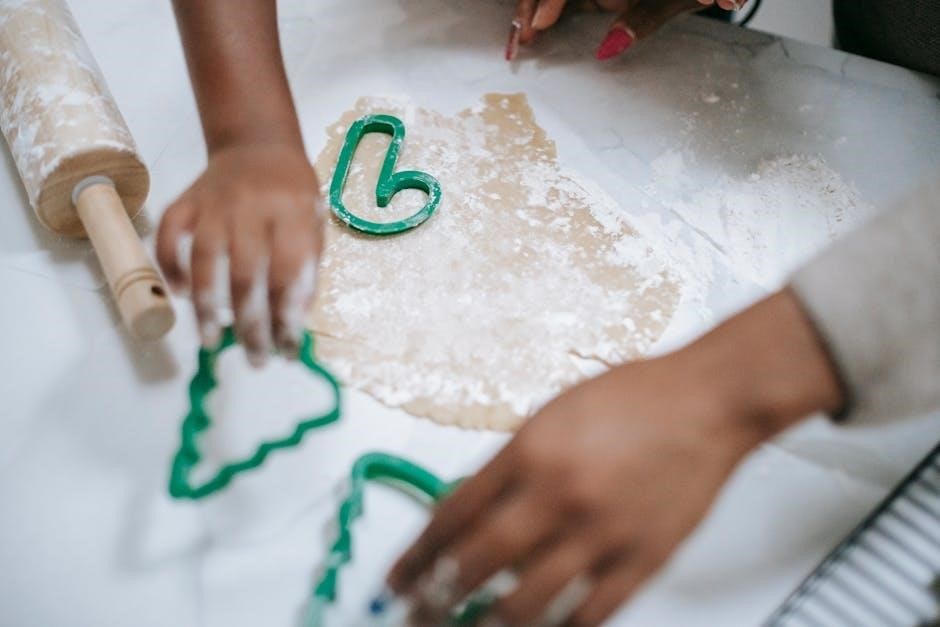
Rolling & Cutting the Cookies
Lightly flour a clean, flat surface and your rolling pin to prevent sticking. Roll out the chilled dough to about ¼ inch thickness – consistency is key for even baking! Use the provided cookie cutters to cut out desired shapes, pressing firmly and cleanly.
Carefully lift the cut cookies and place them onto a parchment-lined baking sheet, leaving a small space between each. Re-roll scraps of dough, but note that they may become tougher with each re-roll. Precise cutting ensures beautifully shaped cookies, ready for decorating!
Baking to Golden Perfection
Preheat your oven to 350°F (175°C). Bake the cookies for 8-10 minutes, or until the edges are lightly golden brown. Keep a close watch – ovens vary! Remove the baking sheet from the oven and let the cookies cool on the sheet for a few minutes before transferring them to a wire rack to cool completely.
Cooling completely is crucial before decorating, as warm cookies will melt the icing. Achieving that perfect golden hue indicates a delightful, tender cookie, ready to become a canvas for your creative designs!

Decorating Techniques & Tips
Unleash creativity with varied icing consistencies and decorating skills! Simple designs or advanced techniques transform cookies into edible masterpieces.
Icing Consistency for Different Designs
Achieving the perfect icing consistency is crucial for successful cookie decorating. For outlining, a thicker “pipeable” consistency is essential – think toothpaste! This holds its shape beautifully, creating defined borders. Flooding requires a thinner consistency, similar to honey, allowing it to spread evenly within the outlined areas.
Adjusting consistency is simple: add powdered sugar for thickness, or a tiny bit of liquid (water or milk) for thinning. Practice is key! Different decorating tips also demand specific consistencies. A fine tip needs a stable icing, while a larger tip can handle a slightly runnier one. Mastering these nuances unlocks a world of decorative possibilities within your DIY cookie kits, ensuring customer satisfaction and stunning results.
Basic Decorating Skills
Even beginners can create beautiful cookies with a few fundamental skills. Mastering the art of outlining is the first step – a steady hand and consistent pressure are key. Next, learn to flood: carefully fill the outlined areas with icing, using a toothpick or scribe tool to spread it evenly and pop any air bubbles.
Simple techniques like dots, lines, and swirls can add significant detail. Encourage kit users to experiment with different decorating tips for varied effects. Providing clear, concise instructions with visual aids (pictures or videos) will boost confidence. Remember, practice makes perfect, and even “mistakes” can be charming!
Advanced Decorating Ideas
For those seeking a challenge, introduce techniques like wet-on-wet designs, where icing is applied before the base layer sets, creating marbled or blended effects. Layering colors and using contrasting shades adds depth and visual interest. Explore brush embroidery, using a fine brush and diluted icing to paint delicate floral patterns.
Stenciling offers precise designs, while edible markers allow for intricate details; Encourage experimentation with texture – sanding sugar, edible glitter, or even crushed candies can elevate the look. Providing inspiration photos or links to tutorials can unlock creativity and inspire more complex designs.

Packaging & Presentation
Attractive packaging and a personalized label significantly enhance the DIY cookie kit experience, making it a memorable and giftable treat for everyone.
Choosing the Right Packaging
Selecting the appropriate packaging is crucial for a successful DIY cookie kit. Consider the kit’s contents and desired aesthetic. Sturdy boxes are ideal, protecting delicate cookie cutters and icing. Clear cellophane bags allow customers to see the colorful sprinkles and decorations, increasing appeal.
Think about the kit’s theme – a festive box for Christmas, or a pastel-colored one for birthdays. Eco-friendly options, like recycled cardboard or biodegradable materials, are increasingly popular. Ensure the packaging is food-safe and adequately seals to maintain ingredient freshness. The size should comfortably accommodate all components without appearing cramped or wasteful. A well-chosen package elevates the perceived value and enhances the overall gifting experience.
Creating an Attractive Label
A well-designed label is essential for branding and providing crucial information for your DIY cookie kit. Include a catchy kit name and a visually appealing design that reflects the kit’s theme. Clearly list the kit’s contents, emphasizing the fun and convenience it offers.
Don’t forget essential details like allergen warnings and basic baking instructions. A personalized touch, such as a thank-you message or your business logo, adds value. Consider using high-quality, water-resistant labels to withstand potential spills. The label should be easy to read and accurately represent the kit’s contents, enticing customers and building trust.
Adding a Personal Touch
Elevate your DIY cookie kit beyond the ordinary with thoughtful personalizations! Include a handwritten note expressing gratitude for the purchase, or a small, themed embellishment tied to the kit’s design. A custom sticker with the recipient’s name adds a special touch for gifts.
Consider adding a unique decorating suggestion or a fun fact about cookies. Packaging the kit with ribbon or twine in a coordinating color demonstrates attention to detail. These small gestures transform a simple kit into a memorable experience, fostering customer loyalty and positive word-of-mouth marketing.

Marketing & Selling DIY Cookie Kits
Successfully market DIY cookie kits by identifying your target audience, utilizing online platforms, and considering both online and in-person sales channels.
Target Audience & Niche
Defining your target audience is crucial for DIY cookie kit success. Consider families seeking engaging activities, individuals gifting unique presents, or aspiring bakers wanting a simplified experience. Niches could include holiday-themed kits (Christmas, Easter), birthday party favors, or kits catering to specific dietary needs like gluten-free or vegan options.
Focusing on a niche allows for targeted marketing and product development. For example, a “Kids’ Superhero Cookie Kit” appeals directly to a specific demographic. Understanding your audience’s preferences – from cookie shapes to icing colors – will drive sales and build customer loyalty. Don’t underestimate the power of personalization within your chosen niche!
Pricing Strategies

Determining the right price for your DIY cookie kits requires careful consideration of costs and perceived value. Factor in ingredient expenses, packaging materials, labor (if applicable), and marketing costs. Research competitor pricing to understand the market landscape. A cost-plus pricing model – adding a desired profit margin to your total costs – is a solid starting point.
Consider tiered pricing based on kit size or complexity. Premium kits with more elaborate decorations or specialized ingredients can command higher prices. Psychological pricing (e.g., $19.99 instead of $20) can also be effective. Regularly evaluate your pricing strategy and adjust as needed to maximize profitability and remain competitive.
Online vs. In-Person Sales
Selling DIY cookie kits presents two primary avenues: online platforms and in-person venues. Online sales, through Etsy, your own website, or social media, broaden your reach significantly, allowing access to a wider customer base. However, shipping costs and potential for damage during transit are key considerations.
In-person sales, at craft fairs, farmers’ markets, or local shops, offer a more personal touch and eliminate shipping concerns. Customers can immediately assess the kit’s contents and quality. Each method has unique advantages; a blended approach – utilizing both online and in-person channels – often yields the best results, maximizing exposure and sales opportunities.

Safety & Allergen Information
DIY cookie kits require clear ingredient lists and allergen warnings to protect consumers, alongside proper storage instructions and “best before” dates.
Ingredient Lists & Allergen Warnings
Detailed ingredient lists are paramount for every DIY cookie kit, ensuring transparency and allowing customers to make informed choices, especially regarding allergies. Clearly state all components of the cookie mix, icing, and sprinkles. Prominently display allergen warnings – common ones include wheat, dairy, eggs, soy, and nuts. If ingredients are processed in a facility that handles allergens, this must be stated.
Consider using bold text or a separate “Allergen Information” section for increased visibility. Providing a complete and accurate list builds trust and protects your customers. Failing to do so can have serious consequences. Always prioritize safety and clarity when communicating ingredient and allergen details within your DIY cookie kit.
Storage Instructions
Proper storage is crucial to maintain the quality and freshness of DIY cookie kit components. Include clear instructions on how to store the dry cookie mix, icing, and any decorations. Typically, the dry mix should be kept in an airtight container in a cool, dry place. Icing may require refrigeration after opening, depending on the recipe.
Specify a timeframe for optimal freshness – for example, “Use dry mix within 6 months for best results.” Advise customers to store baked cookies in an airtight container at room temperature. Detailed storage guidance ensures a delightful baking experience and minimizes waste, enhancing customer satisfaction with your DIY cookie kit.
Best Before Dates
Clearly marking best before dates is essential for DIY cookie kit safety and quality. These dates indicate how long the ingredients will maintain peak freshness and flavor, not necessarily safety. For dry mixes, a “Best Before” date of 6-12 months from the packaging date is common. Icing should have a shorter date, typically 3-6 months, especially if it contains fresh ingredients.
Baked cookies, if included, should have the shortest date – ideally consumed within a week or two. Include instructions like “Best enjoyed within [date] for optimal taste.” Accurate dating builds trust and ensures customers enjoy a delicious, high-quality product from your DIY cookie kit.